Showing posts with label Computer. Show all posts

Tuesday, May 17, 2016

Top 12 Easy Ways To Increase Battery Life of Laptop


12 Easy Ways To Increase Battery Life of Laptop

As we all know, our laptops don’t have all-day battery life, so it is a real struggle to manage our laptop whole day with a very little battery backup. But, we have some tips that will give some more life to your laptop’s battery. Follow up the full post to know about it.

Today we are here with the tips for How To Increase Battery Life of Laptop. Today more than billions of people are having their own laptop and we are totally dependent on it for work purposes. The major issue with the laptops is the battery life as in our busy schedules we don’t get enough time to charge our laptop properly and in result it fails to deliver the expected backup. So to resolve this issue we are here with some tips by which you can boost up battery backup of your laptop. Just follow up the below post to proceed.

12 Easy Ways To Increase Battery Life of Laptop

The normal battery backup of old laptops generally ranges from 1-2 hours. However, you can use the below method to increase it for better performance.

1. Adjust Your Settings


Adjust Your Settings

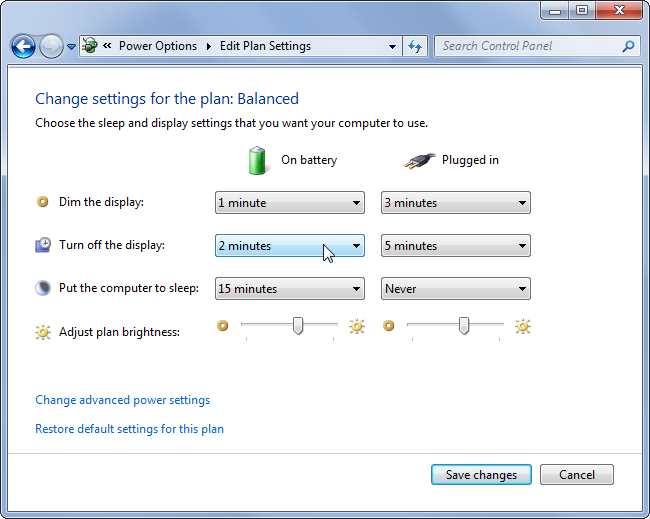
The best way to reduce your laptop’s battery consumption is by adjusting the power settings of your laptop. You can alter the battery consumption settings and you can choose the best power saving option for your laptop in which you can choose to set less brightness and many more settings.

2. Cut Down External Devices


Cut Down External Devices

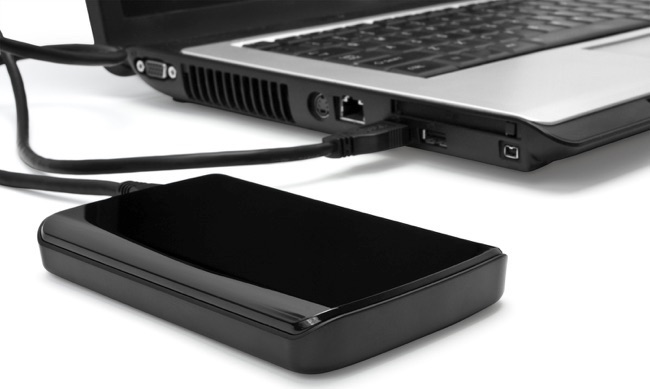
Any external devices that are connected to your laptop consume power like peripheral devices like external mouseUSB Pendrive and printers etc consumes much power. So better is to remove all of the external devices that are not currently being used.

3. Turn Off Wifi/Bluetooth etc.


Turn Off Wifi/Bluetooth etc.

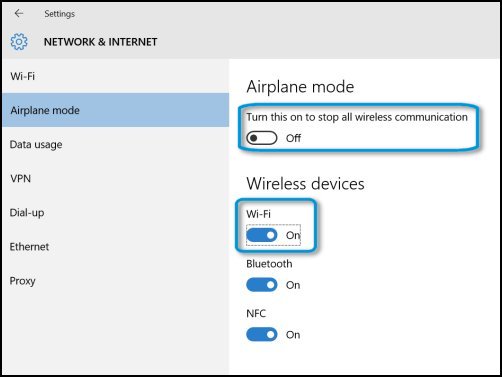
Wifi and Bluetooth consume much power than your anticipation. As they need external signals to operate which need more power. So better is to turn off all these external sharing networks to increase battery backup of your device.

4. Turn Off The Apps and Processes


Turn Off The Apps and Processes

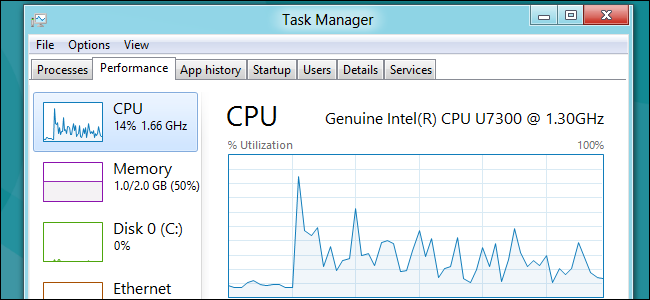
There are lots of processes and apps that automatically runs on your computer when you turn it on. These apps and process consume lots of power as they run on your ROM and effects on your battery, so it’s better to close these apps from task manager by pressing Ctrl+Alt+Delete on your keyboard and ending the unwanted process.

5. Add more RAM


Add more RAM
Add more RAM

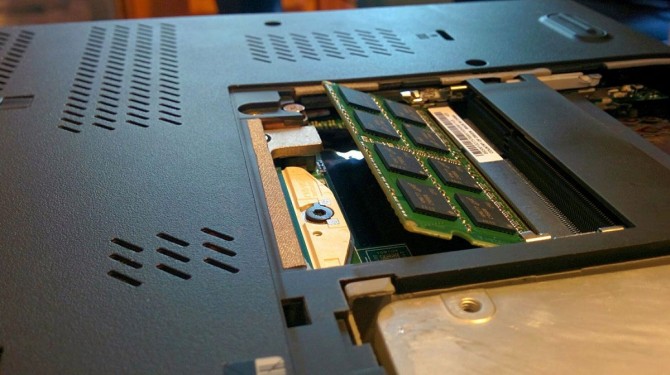
Better the Ram better is the computer performance and the better is the power management. So you must have better Ram to operate tasks of your computer. For this, you can use third parties tool to boost Ram or adding an external Ram to your laptop. 

6. Use Hibernate Instead Of Standby


Use Hibernate Instead Of Standby

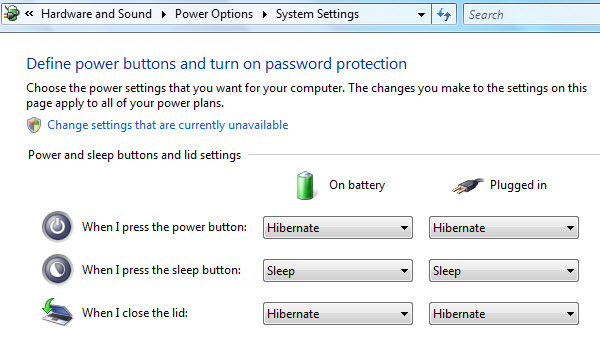
When your laptops are in  standby mode it keeps on running the power consumption, but when you puts your computer into hibernate mode then your power consumption goes to zero. Moreover, going into hibernate mode saves all your data. so it’s always to choose to hibernate instead of standby.

7. Software updates


Software updates
Software updates

The outdated software of your laptop can badly affect your battery as they consume much power when they perform any processes so better is to keep your drivers and software up to date.

8. Avoid Over Charging


Avoid Over Charging
Avoid Over Charging

By overcharging the cells of your battery gets damaged and it can affects lot on your battery backup and so avoid over-charging of your battery as much you can to get the better battery backup from your laptop.

9. Keep The Battery Contacts Clean


Keep the battery contacts clean

The points or the contact from which your battery cells get connected to the laptop power providing needs a better caring as carbons get collected on them some time. And this can affect the battery performance so better is to make them clean regularly.

10. Windows Power-Troubleshooter


Windows Power-Troubleshooter

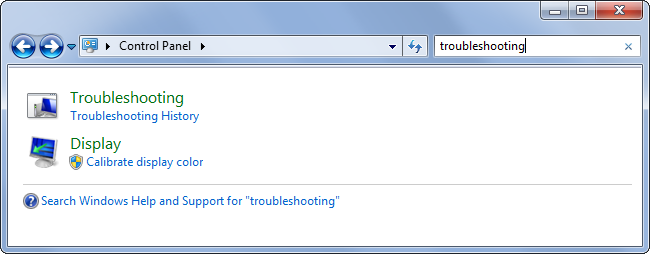
You can run the Power troubleshooter to adjust your computer’s power settings. The Power troubleshooter checks things like your computer’s timeout settings, which determine how long the computer waits before turning off the monitor display or entering sleep mode. Adjusting these settings can help you conserve power and extend your computer’s battery life.

11. Using MSConfig


Using MSConfig
Using MSConfig

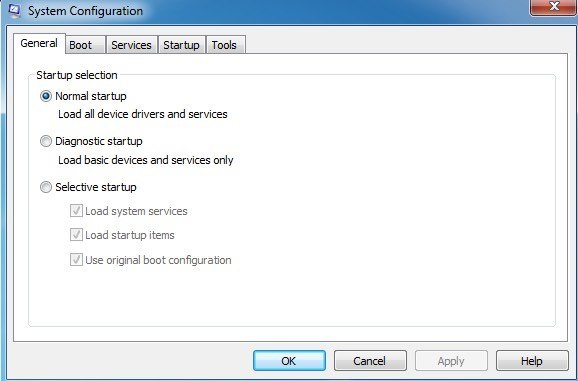
MSConfig is a system utility to troubleshoot the Microsoft Windows startup process. It can disable or re-enable software, device drivers, and Windows services that run at startup, or change boot parameters.You can avoid unnecessary programs to load at startup by simply stopping them

12. Choose Better Laptop


Choose Better Laptop

While buying the laptop you must go for better battery milliampere-hour (mAh) the better is the  milliampere-hour  the better will be the battery backup. So you must select the best laptop for getting the best battery backup.
So above is all about How To Increase Battery Life of Laptop. You can easily increase battery backup by following all these steps and measure. Hope you like the post, don’t forget to share this post with your friend and leave a comment if you know any of another measure.

Monday, May 16, 2016

Make Windows Play a Sound When You Press Caps Lock, Num Lock, or Scroll Lock

00_lead_image_caps_lock_with_sound
Have you ever turned on the Caps Lock key ACCIDENTALLY WHILE YOU’RE TYPING? Or turned off the Num Lock key unintentionally and then tried to use the number keypad? No worries. There’s a setting in Windows that can notify you with a sound whenever you press one of these keys.
The Toggle Keys setting in Windows provides the option to play a tone when you press the Caps Lock, Num Lock, or Scroll Lock keys. Here’s how to enable it in Windows 10, 8, and 7 so you can know when you’ve accidentally pressed one of them.

How to Enable Toggle Keys in Windows 10

To enable the Toggle Keys setting in Windows 10, click “Settings” on the Start menu.
01_win10_selecting_settings
On the Settings dialog box, click “Ease of Access”.
02_win10_clicking_ease_of_access
Click “Keyboard” in the list of items on the left side of the Ease of Access screen.
03_win10_clicking_keyboard
In the Toggle Keys section, click the “Hear a tone when you press Caps Lock, Num Lock, and Scroll Lock” slider button so it turns blue and reads “On”. If you want to be able to quickly enable and disable the tone for these buttons, click the “Turn on Toggle Keys by holding the NUM LOCK key for 5 seconds” slider button so it also turns blue.
04_win10_enabling_toggle_keys
To close the Settings dialog box, click the “X” button in the upper-right corner of the dialog.
04a_win10_closing_settings

How to Enable Toggle Keys in Windows 8

If you’re using Windows 8 or 8.1, move your mouse to the extreme lower-right corner of the screen to activate the Charms Bar and click “Settings”.
05_win8_clicking_settings
On the Settings panel on the right side of the screen, click “Change PC settings” at the bottom.
06_win8_clicking_change_pc_settings
Click “Ease of Access” in the list of items on the left side of the PC settings screen.
07_win8_clicking_ease_of_access
In the list of items on the left side of the Ease of Access screen, click “Keyboard”.
08_win8_clicking_keyboard
In the Toggle Keys section on the right side of the Ease of Access screen, click the “Toggle Keys” slider button so it turns purple and reads “On”. Unlike Windows 10 and Windows 7, there is no option to be able to use the Num Lock key to enable and disable the Toggle Keys option.
09_win8_enabling_toggle_keys
To close the PC settings dialog box, click the “X” button in the upper-right corner.
10_win8_closing_pc_settings

How to Enable Toggle Keys in Windows 7

To enable the Toggle Keys setting in Windows 7, click “Control Panel” on the Start menu.
11_win7_clicking_control_panel
On the Control Panel screen, click the “Ease of Access” link.
12_win7_clicking_ease_of_access
In the Ease of Access Center section on the right side of the Ease of Access screen, click the “Change how your keyboard works” link.
13_win7_clicking_change_how_keyboard_works
In the “Make It Easier to Type” section, click the “Turn on Toggle Keys” check box so there is a check mark in the box. To be able to quickly enable and disable the tone for the Caps Lock, Num Lock, and Scroll Lock buttons, click the “Turn on Toggle Keys by holding the NUM LOCK key for 5 seconds” check box so it also contains a check mark.
14_win7_enabling_toggle_keys
To close the Control Panel window, click the “X” button in the upper-right corner.
15_win7_closing_control_panel
If you turned on the “Turn on Toggle Keys by holding down the NUM LOCK key for 5 seconds” option in Windows 10 or 7, you can quickly enable and disable the Toggle Keys setting. In Windows 8, you have to go into the PC settings each time you want to enable or disable the option.

Get a Taskbar Notification When Caps Lock or Num Lock Are Enabled

00_lead_image_traystatus
All of us, at one point, have accidentally pressed the Caps Lock key or Num Lock key by accident. Then, you type a password and wonder why it doesn’t work. Wouldn’t it be nice to know at a glance the status of your Caps Lock and Num Lock keys?

You can make Windows play a sound when you press the Caps Lock key or Num Lock key. However, if that starts to drive you nuts, you can install a very small freeware program, called TrayStatus, that notifies you visually of the status of your Caps Lock and Num Lock keys, as well as other keys and even hard drive activity in real time.
Download TrayStatus, double-click the .exe file, and follow the on-screen instructions to install the program. You’re asked during the installation whether you want to launch TrayStatus at Windows startup. If you want TrayStatus available automatically when Windows starts, select this box and click “Next”.
01_launch_at_windows_startup
On the final installation screen, select the “Launch Now” button to start TrayStatus automatically when you close the setup wizard. Click “Finish”.
02_launch_now
TrayStatus displays a separate icon for each key for which you can view the status. By default, the Caps Lock and Num Lock icons display in the system tray, but you can enable more status icons by right-clicking on either the Caps Lock icon or the Num Lock icon in the system tray and selecting “TrayStatus Settings” from the popup menu.
03_selecting_traystatus_settings
On the Settings dialog box, make sure the Options tab is active. In the Options section on the right, you can choose whether TrayStatus starts with Windows.
To add more status icons to the system tray, select the check boxes for the icons you want to see in the Default Icons section. Any icons with a check mark in its check box will display in the system tray and show you the status of that item in real time.
04_settings_dialog_selecting_icons
Click “OK” to accept your changes and close the Settings dialog box.
04a_clicking_ok
The default icons you chose on the Settings dialog box all display in the system tray as shown below.
00_lead_image_traystatus
There’s only one problem: By default, on most computers, these icons show up in your popup System Tray, not on the taskbar itself. If you want to have them visible all the time, just click them and drag them onto the taskbar. (Note that there’s a separate icon for each item you check in TrayStatus’ settings.)
06_icons_on_taskbar
Now, we see all the icons on the Taskbar and can monitor the status of each key and the hard drive activity. For the hard drive, read activity shows in green on the left side of the icon and write activity shows in red on the right. When you move your mouse over the hard drive activity icon, the current speed of the read and write activity displays in a tooltip.
the Caps Lock and Num Lock, you might want to
 make the Shift, Ctrl, and Alt keys toggle like the Caps Lock and Num Lock keys. 
This can be handy if you select a lot of files often or do other tasks involving heavy use of these keys. You can toggle the keys on with a single press and not have to hold the keys down while pressing other keys.

How to Open Your Optical Drive Using a Keyboard Shortcut in Windows

00_lead_image_cd_drive_on_laptop
Most optical disc drives require you to press a button on the front of the drive to open it. This button can be hard to find or get to on some machines. However, you can use a keyboard shortcut to open your optical drive.
There’s a free utility, called Door Control, that allows you to easily open your optical drive using an icon in the system tray or a keyboard shortcut you specify. If your PC is in a place where the optical drive is hard to see, or your optical drive’s button is broken, try out Door Control.
Download Door Control (scroll down a bit on the page), double-click the .exe file, and follow the on-screen instructions to install the program. When you get to the last screen on the setup wizard, click the “Launch Door Control” check box so there is a check mark in the box and click “Finish”.
01_launch_door_control
Door Control runs and an eject icon is added to the system tray. When you move your mouse over the icon, a tooltip displays showing you which drive is currently selected and that no Shortcut Key has been defined yet.
02_door_control_in_system_tray
If you have multiple optical drives, you can select which drive you want to be able to open using Door Control. Right-click on the Door Control eject icon in the system tray, select the “Drive” option at the top of the popup menu, and then select the drive you want to open using Door Control from the submenu.
03_selecting_drive
RELATED ARTICLE
Mount an ISO image in Windows 7, Windows 8, 10, or Vista
Most of the utilities that you used to mount an ISO image in Windows XP don't work in Windows Vista... how annoying is that? [Read Article]
NOTE: If you’ve mounted an ISO file, the letter for that drive displays in the submenu. You can “eject” a mounted ISO file, but note that if you used Virtual CloneDrive to mount it as discussed in the linked article, the ISO file may mount itself again. That’s what happened to me when I tested this. An ISO file mounted using Virtual CloneDrive (which you really only need if you’re using Windows 7) must be unmounted using Virtual CloneDrive.
If you only have one optical drive and have no ISO files mounted, the “Drive” option is not available on the menu. If you add an external drive or mount an ISO file while Door Control is running, and you want it accessible in Door Control, you must exit the program and run it again.
To assign a keyboard shortcut you can use to open your optical drive, access the popup menu again and select “Hot Key”.
04_selecting_hot_key
Make sure the cursor is in the “Shortcut Key” edit box, which initially should read “None”. Press the keyboard shortcut you want to use to enter it into the edit box, and then click “OK”.
05_setting_shortcut_key
Now, when you move your mouse over the eject icon in the system tray, the shortcut key you assigned displays.
06_door_control_with_shortcut_key
If you want Door Control to start automatically every time Windows starts, select “Load Door Control at Startup” from the popup menu. When the option is on, a check mark displays next to it, as shown below.
07_load_door_control_at_startup
You can also change the color of the button and the eject symbol on the button. To do this, right-click on the Door Control icon and select “Set button colors” from the popup menu.
08_selecting_set_button_colors
Colors can be selected for the “Foreground” (the eject symbol) and the “Background” on the button in its “Normal” state and “On Click”. Click “Reset” to reset the colors to the default.
09_clicking_background_in_normal_section
Click on a color in the “Basic colors” section or click on a box under “Custom colors” to create your own color using the color selector on the right or the edit boxes to define a specific color. Click “OK” once you’ve chosen your color.
10_selecting_a_color
The button in the system tray dons the newly selected colors.
11_changed_color
Door Control claims to be able to also close the optical drive, but that feature depends on the hardware. It probably won’t work on most laptops, but may work on desktop PCs, where pressing the button a second time closes the door. I tested Door Control on both my desktop PC and laptop and it opened and closed the optical drive on the desktop PC, but only opened the drive on the laptop.

Twitter Facebook

 
Powered by Blogger